 USD
USD  GBP
GBP  CAD
CAD  AUD
AUD 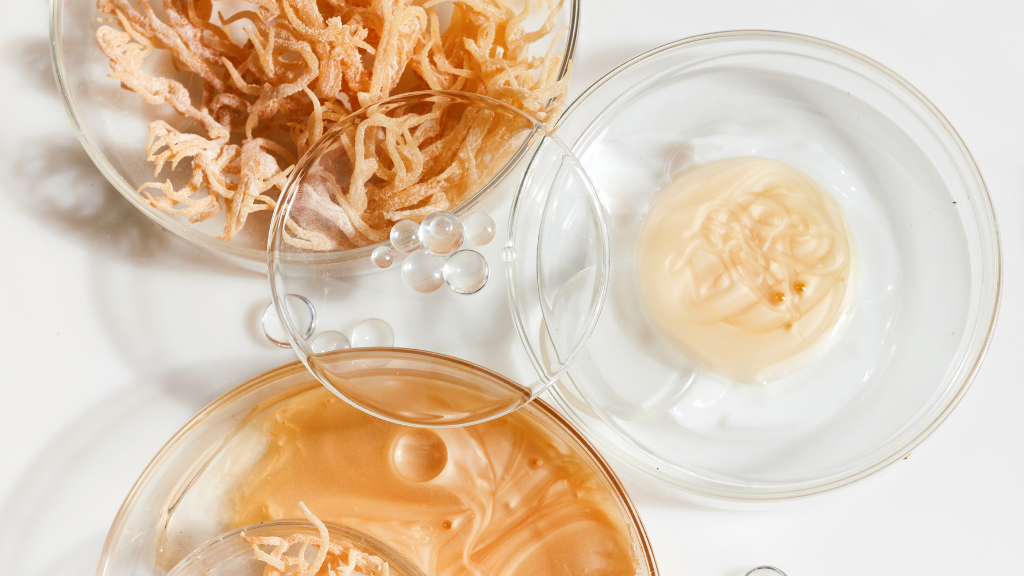
Sea moss gel has become one of the most popular ways to add minerals and fiber to your daily routine. It's used in smoothies, teas, skin care, and wellness products, and it's one of the top-selling products for small business owners who buy wholesale sea moss to repackage and resell.
This guide covers everything you need: what to buy, how to clean and soak sea moss, three different methods for making gel, how to store it, and how to use it every day. If you're making sea moss gel for the first time, or want to improve what you're already doing, you're in the right place.
What You'll Need to Get Started
You don't need much to make sea moss gel at home. Here's what to gather before you begin:
Ingredients:
- 1 cup (approximately 1–1.5 oz) dried sea moss
- 2–3 cups spring or alkaline water (avoid tap water)
- Optional: juice of half a lime or lemon (helps with the ocean smell during soaking)
Equipment:
- Large bowl for soaking
- Fine-mesh strainer
- High-speed blender
- Clean glass jar with lid
- Refrigerator
Understanding Sea Moss: Types and What to Look For
Not all sea moss is the same. Knowing what you're buying helps you get better results, and helps you explain the product clearly to your own customers.
Different Types of Sea Moss
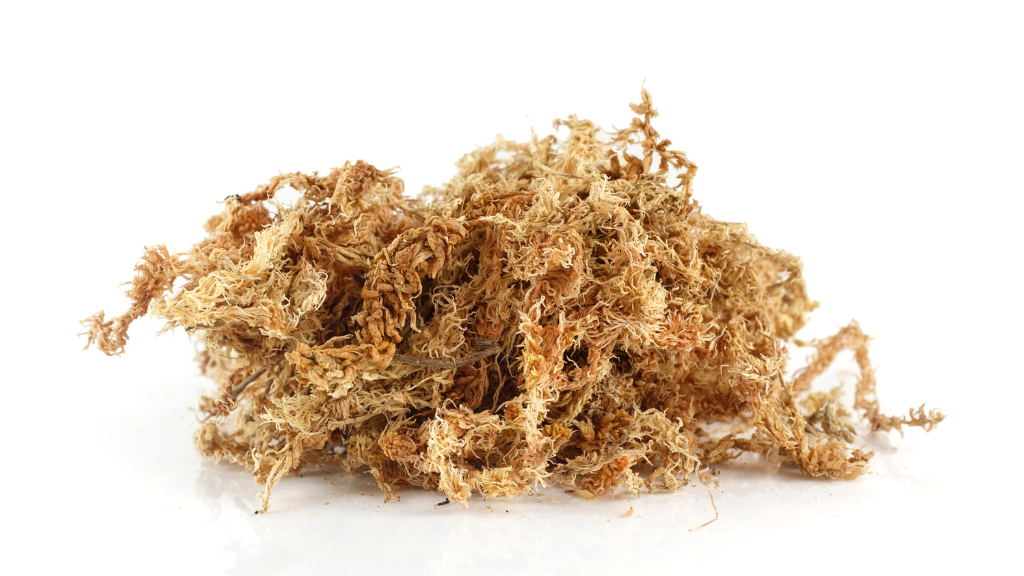
Chondrus crispus (Irish Sea Moss)
This is the most widely recognized variety. It grows along the rocky coastlines of the North Atlantic, including Ireland, Canada, and parts of the U.S. coast. It has a fan-like shape and a golden to dark purple color depending on sun exposure.
Genus Gracilaria
Often sold as "Caribbean sea moss," this variety grows in warmer waters. It tends to have a lighter tan or gold color after sun-drying and is the type most commonly associated with Caribbean wellness traditions.
Purple sea moss
A form of wildcrafted sea moss with higher antioxidant content due to pigmentation from ocean conditions. It's less common and often priced higher.
Sea moss powder
Made from dried, ground sea moss. It skips the soaking step and works well in capsules, smoothies, and skincare formulations.
How to Spot Quality Sea Moss
Good dried sea moss should:
- Smell mildly of the ocean (not rotten or sour)
- Have visible natural color variation, not a uniform bright white
- Expand significantly when soaked, usually 2–3 times its original size
- Not have a heavy coating of salt or appear artificially bleached
Avoid sea moss that looks too uniform or bright white. This can be a sign of over-processing or artificial bleaching, which strips minerals.
At Africa Imports, we carry wildcrafted sea moss sourced from clean ocean environments. Shop our sea moss product range to find the right option for your needs or your business.
Preparing Your Sea Moss: Cleaning and Soaking
Proper preparation is the foundation of good sea moss gel. Rushing this step leads to a gritty texture or a strong ocean flavor that's hard to mask. Take your time here and the rest of the process goes smoothly.
Step 1: Rinse Thoroughly
Place your dried sea moss in a fine-mesh strainer. Run cold water over it for 2–3 minutes, using your hands to gently separate the pieces and remove any visible debris. Look for small shells, sand, or bits of seaweed.
After rinsing in the strainer, transfer the sea moss to a bowl of clean water. Swirl it around and inspect it one more time. Drain and repeat if needed. The ocean smell is completely normal at this stage. It will reduce during soaking.
Step 2: Soak Your Sea Moss
Place the rinsed sea moss in a large bowl. Cover it completely with cold spring or alkaline water (don't use tap water). The sea moss will expand 2–3 times its original size, so use plenty of water.
Soaking guidelines:
- Minimum soak time: 4–6 hours
- Recommended soak time: 12–24 hours
- Maximum soak time: 48 hours (soaking longer risks fermentation)
- Optional: add the juice of half a lime or lemon to the soaking water
The sea moss is ready when it feels soft, expanded, and slightly translucent. Drain and rinse once more before blending.
Making Sea Moss Gel: Step-by-Step Methods
Choose the method that works best for your needs. All three produce good gel.
Method 1: Classic Soak and Blend (Recommended for Beginners)
- Drain your soaked sea moss completely.
- Add 1 cup of soaked sea moss to your blender.
- Add 1½–2 cups fresh spring or alkaline water.
- Blend 1–3 minutes until smooth and creamy.
- Pour into a clean glass jar.
- Refrigerate 2–4 hours to thicken.
Texture checkpoint: The gel should coat the back of a spoon and have a pudding-like consistency.
Method 2: Quick Simmer Method
- After soaking, place sea moss in a saucepan with 2 cups of spring water.
- Bring to a low simmer.
- Simmer for 10–15 minutes, stirring occasionally.
- Cool to room temperature.
- Blend as in Method 1.
Method 3: Flavored Sea Moss Gel
Follow Method 1, then add flavor ingredients during blending.
Natural sweeteners:
- 2–3 soaked Medjool dates
- 1–2 tablespoons agave syrup
- 1 tablespoon raw honey
Fruit options (1 cup):
- Mango or pineapple
- Strawberries or blueberries
- Banana
Herbal/spice options:
- ½ teaspoon turmeric
- ½ teaspoon cinnamon
- ¼ teaspoon vanilla extract
- Fresh ginger
Flavored gels should be used within 2 weeks.
Getting the Right Consistency Every Time
If too thick: Add 1–2 tablespoons of water and re-blend.
If too thin: Let sit 24 hours or add more sea moss.
If lumpy: Blend longer or strain.
If separated: Stir before use.
Storing Your Sea Moss Gel Properly
Refrigerator:
- Store in airtight glass jar
- Unflavored: 3–4 weeks
- Flavored: up to 2 weeks
Freezer:
- Freeze up to 3 months
- Use ice cube trays (1 cube ≈ 1 tablespoon)
- Thaw overnight in refrigerator
Signs of spoilage:
- Sour smell
- Mold
- Unusual sliminess
When in doubt, throw it out.
How to Use Sea Moss Gel Daily

Recommended Daily Amount
1–2 tablespoons per day for most adults.
Ways to Use It
Smoothies
Blend 2 tablespoons with banana, almond milk, peanut butter, and spinach.
Tea
Stir 1 tablespoon into hot water with lemon and honey.
Caribbean Sea Moss Drink
Blend sea moss gel, plant milk, dates or agave, vanilla, nutmeg, and cinnamon. Serve chilled.
Cooking
Use as a natural thickener in soups and sauces.
Skin Care
Apply a thin layer to clean skin for 15–20 minutes. Rinse.
Troubleshooting Common Sea Moss Gel Problems
Problem: Won’t thicken
Solution: Refrigerate 24 hours or add more sea moss
Problem: Too fishy
Solution: Add lemon to soak water; rinse more thoroughly
Problem: Yellow/brown
Solution: Often from cooking too long
Problem: White foam
Solution: Normal; settles in fridge
Problem: Didn’t expand
Solution: May be low quality or heavily processed
The History and Cultural Roots of Sea Moss
Sea moss has been used in Ireland and across the Caribbean for generations. It became especially popular in Jamaican and Trinidadian wellness traditions. Today, it plays a major role in Black wellness communities in the U.S. and UK.
Nutritional Profile: What's in Sea Moss
Key nutrients include:
- Iodine
- Potassium
- Calcium
- Magnesium
- Sulfur
- Folate (Vitamin B9)
- Vitamins A, E, K
- Soluble fiber
Nutrient levels vary by source and processing method.
Safety Guidelines and Who Should Avoid Sea Moss
Avoid or consult a doctor if you:
- Have thyroid conditions
- Are pregnant or breastfeeding
- Take thyroid medication
- Have seaweed allergies
- Have IBS or IBD
Sea moss is not a medication and is not intended to diagnose, treat, cure, or prevent disease.
Small Business Tip: Making Sea Moss Gel for Resale
- Buy dried sea moss in bulk (12–24 month shelf life)
- Use food-grade jars
- Label clearly with batch date and use-by date
- Check cottage food laws
- Educate customers to increase repeat purchases
FAQs: Everything You Need to Know About Making Sea Moss Gel
Do you boil sea moss to make gel?
No. The raw soak-and-blend method is most common.
Can you make it without a blender?
Yes, mash by hand or use the powder method.
How long should you soak it?
12–24 hours is recommended.
How long does gel last?
3–4 weeks (unflavored), 2 weeks (flavored).
Health and Safety Disclaimer
The information in this article is for educational purposes only and has not been evaluated by the Food and Drug Administration. Sea moss products are not intended to diagnose, treat, cure, or prevent any disease or health condition. Always consult a qualified healthcare provider before adding any new supplement to your routine, especially if you have a pre-existing health condition, are pregnant, or are taking medication.